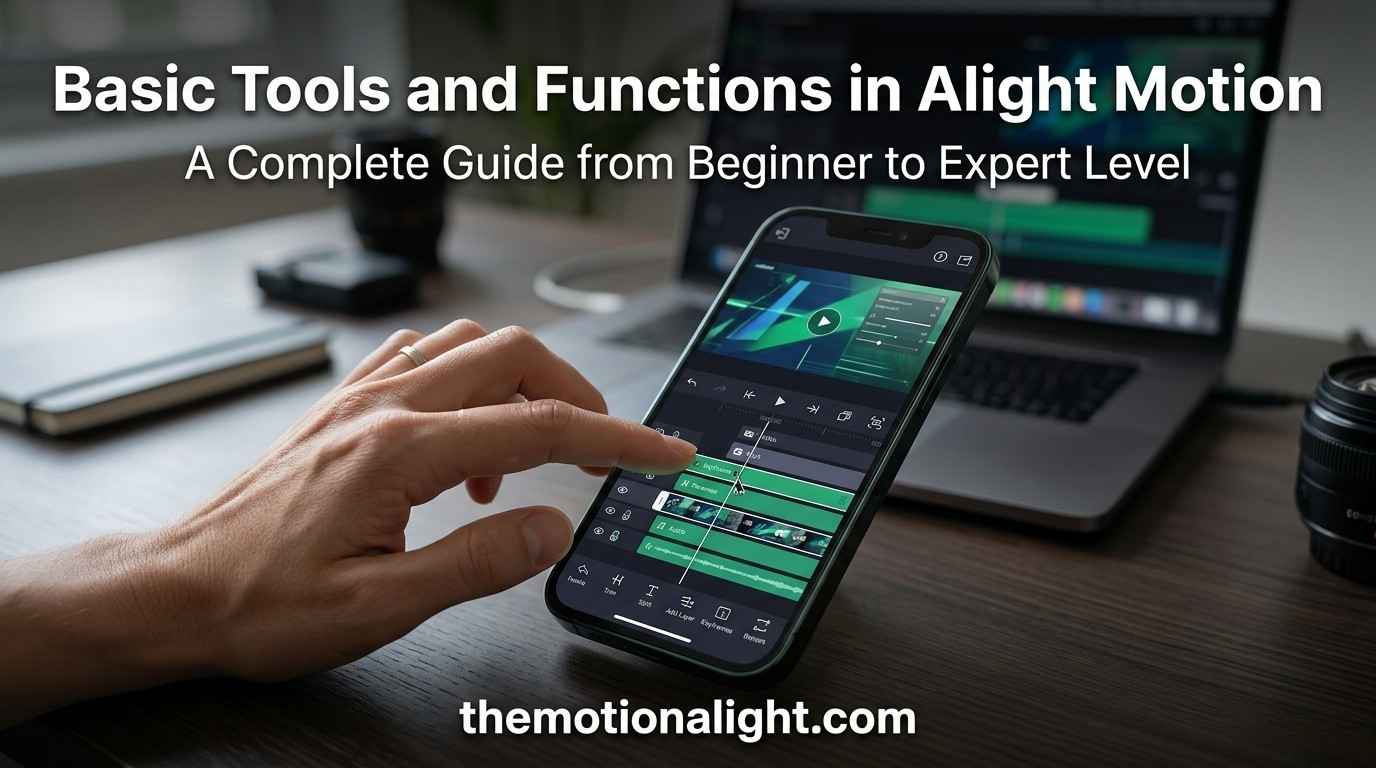
Basic Tools and Functions in Alight Motion A Complete Guide from Beginner to Expert Level
If you have spent any time in the mobile content creation world, you have almost certainly run into Alight Motion. This app has earned a serious reputation among creators on TikTok, Instagram Reels, YouTube Shorts, and beyond because it delivers desktop-quality animation and video editing capabilities directly on your phone. Developed by Alight Creative Inc., Alight Motion is not a simple clip-stitching app. It is a fully fledged motion graphics and visual effects platform that runs on Android and iOS devices, and it has been that way since its debut in 2018.
What makes this application genuinely different from its competitors is its layer-based editing engine, its keyframe animation system, and its deep library of visual effects. Most mobile editors give you a linear track to drop clips onto and a handful of preset transitions. Alight Motion gives you a compositing workspace where every element sits on its own layer, every property can be animated over time, and every effect can be stacked, combined, and fine-tuned to achieve results that look nothing like a phone edit.
This guide covers every major basic tool and advanced function in Alight Motion from the ground up. Whether you are creating your very first project today or you have been using the app for years and want to push your skills deeper, this resource walks through every section of the application with enough detail to make everything click. By the time you finish reading, you will understand not just what each tool does but why it exists and when to reach for it.
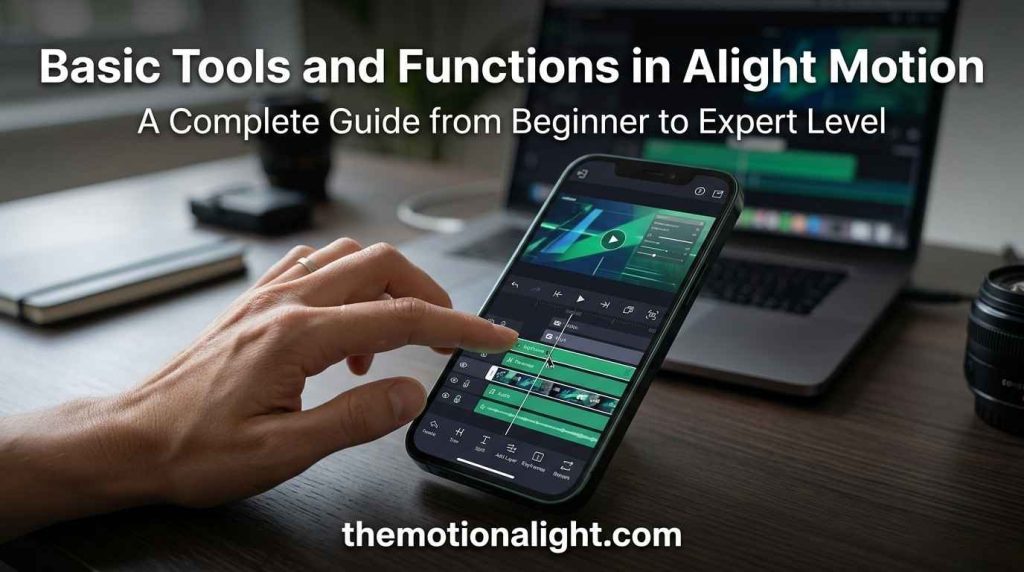
What Is Alight Motion and Who Uses It
Alight Motion is a professional-grade mobile video editing and animation application built by Alight Creative Inc. and available on both the Google Play Store and the Apple App Store. It sits in a category occupied by only a handful of other apps because it combines vector graphics support, bitmap editing, keyframe animation, multi-layer compositing, audio editing, visual effects, color grading, and high-resolution export into a single mobile application.
The app targets a wide range of creators. Social media editors use it to produce animated intros, branded transitions, and stylized reels. Motion designers use it to build animated logos and kinetic typography. Video content creators use it for color grading, overlays, and professional cuts. Students and aspiring editors use it because it teaches real animation principles through a hands-on workspace that mirrors professional tools like Adobe After Effects without requiring a computer or expensive hardware.
On the technical side, the app supports resolutions up to 4K, frame rates from 24 to 60 frames per second, and exports in multiple formats including MP4, GIF, PNG sequence, and XML. The free version includes a visible watermark and restricts some premium effects, while the subscription removes the watermark and unlocks the full effects library. The core animation engine, however, is fully accessible in the free version, which is one reason the app has attracted such a large global user base.
Alight Motion Free vs Premium: What You Actually Get
| Feature | Free Version | Premium / Subscription |
|---|---|---|
| Watermark on export | Yes | Removed |
| Core animation engine & keyframes | Full access | Full access |
| Layer types (video, image, shape, text, audio) | Full access | Full access |
| Effects library | Partial (core effects only) | Full library unlocked |
| Font library | Basic selection | Full premium font library |
| Export resolution | Up to 1080p | Up to 4K |
| XML preset import/export | Yes | Yes |
| Ads in interface | Yes | Removed |
Device Requirements and Initial Setup
Alight Motion runs on Android 5.0 and above as well as iOS 13.0 and above. For smooth performance on complex projects, a device with at least 3GB of RAM is recommended, and 4GB or more will noticeably improve rendering speed when working with multiple layers. Storage space requirements vary by project size, but keeping at least 2GB of free space available is a practical starting point.
Installing the app is straightforward. Search for Alight Motion in the App Store or Google Play Store, download the official version, and install it on your device. After installation, launch the app and you will arrive at the project dashboard. From here, you can create a new project, open an existing one, browse community presets, or access your settings. Spending a few minutes exploring this dashboard before starting your first edit is time well spent.
Quick Reference: Project Settings by Platform
| Platform / Purpose | Resolution | Aspect Ratio | Recommended FPS |
|---|---|---|---|
| TikTok / Reels / Shorts | 1080 x 1920 | 9:16 Vertical | 30 or 60 FPS |
| Instagram Feed Square | 1080 x 1080 | 1:1 Square | 30 FPS |
| YouTube Widescreen | 1920 x 1080 | 16:9 Landscape | 24, 30, or 60 FPS |
| 4K Professional | 3840 x 2160 | 16:9 Landscape | 24 or 30 FPS |
| Cinematic Wide Look | 1920 x 816 | 2.35:1 Widescreen | 24 FPS |
Understanding the Alight Motion Interface in Full Detail
The Alight Motion interface is built around three main areas that work together constantly as you edit. Learning what each area does and how they interact with each other is the single most important foundation you can build before touching any specific tool. Many beginners skip this step and spend hours confused about why things are not working. A clear understanding of the workspace eliminates most of that confusion immediately.
The Preview Window
The preview window occupies the upper portion of the screen and shows you exactly how your project looks at the current playhead position. This is your visual feedback area. When you move an element, resize a layer, apply an effect, or adjust a color, the result appears instantly in the preview window. You can play your animation in real time by tapping the play button, and you can scrub through the timeline by dragging the playhead left or right to inspect any specific frame.
The preview window also functions as a direct touch canvas. When the move tool is active, you can tap any visible element in the preview window to select its layer, then drag it to reposition it. You can pinch to scale, rotate with two fingers, and interact with transform handles directly in this area. This makes the preview window a dual-purpose tool: a display area and an interactive editing surface at the same time.
The Timeline Panel
The timeline is the backbone of your project. It appears in the lower section of the screen and displays every layer in your composition as a horizontal track. Each track represents one element: a video clip, an image, a shape, a text layer, or an audio file. The playhead runs vertically across all tracks and represents the current moment in time. Moving the playhead moves you through the entire project simultaneously across every layer.
Within the timeline you can see the duration of each layer, represented by the length of its track. A shorter track means the element appears on screen for less time. You can drag the edges of a track to trim or extend it. You can slide the entire track left or right to change when the element enters and exits the frame. You can reorder tracks by long-pressing and dragging them up or down, which changes the visual stacking order in the preview window. Layers higher in the timeline stack appear in front of layers below them.
The timeline also shows keyframe markers as small diamond shapes on individual tracks. These diamonds indicate points in time where a property has been set. Understanding keyframes in context with the timeline is essential for animation, and this relationship is covered in full depth in the keyframe section of this guide.
The Tool Panels and Menus
The tool panels appear on the sides and at the bottom of the screen depending on what you have selected. When no layer is selected, the bottom panel shows general project options. When a layer is selected, the panel context changes to show editing options specific to that layer type. For a video layer you will see trim, speed, and color controls. For a text layer you will see font, size, color, and animation controls. For a shape layer you will see fill, stroke, and path controls.
At the top of the screen you will find the project menu, the undo button, and the export button. Tap the three-line menu icon to access project settings, including resolution, frame rate, and background color. The undo button lets you step backward through recent actions. Most actions in Alight Motion can be undone multiple steps, which encourages experimentation without fear of making permanent mistakes.
Creating Your First Project: Settings That Matter
When you tap the plus button to start a new project, Alight Motion presents you with several settings before the workspace opens. These settings define the fundamental properties of your project and choosing them correctly from the start saves you from having to rework everything later. Let us go through each one and explain what it means in practical terms.
Resolution and Aspect Ratio
Resolution refers to the number of pixels in your video frame, expressed as width by height. The most common choice for most creators is 1920 by 1080, which is Full HD in a horizontal landscape format. For Instagram Reels, TikTok, and YouTube Shorts, the standard is 1080 by 1920, which is a vertical portrait format. Square content for Instagram feeds uses 1080 by 1080. If you are creating content for a professional client or planning to display your work on large screens, 3840 by 2160 gives you 4K quality, though it requires more processing power and storage.
Aspect ratio is the proportional relationship between width and height. A 16:9 ratio is the standard widescreen format used by most video platforms. A 9:16 ratio is vertical, designed for mobile viewing. A 1:1 ratio is perfectly square. Choosing the wrong aspect ratio at the start means either black bars appearing on your published video or important parts of your image being cropped off. Always match your project aspect ratio to the platform you are publishing on before you start adding content.
Frame Rate Explained Clearly
Frame rate, measured in frames per second or FPS, determines how many individual images your video displays every second. A higher frame rate produces smoother motion, while a lower frame rate can create a more cinematic or stylized look. For most social media content, 30 FPS is the standard and works well. For gaming content, reaction videos, or action footage where fast motion needs to look crisp, 60 FPS is preferable. For a classic cinematic look that mimics the feel of Hollywood films, 24 FPS creates that characteristic motion blur and rhythm. Setting this correctly from the beginning matters because changing it after the project is built can misalign audio and cause timing issues.
Background Color and Transparency
The background color you set becomes the base canvas of your project. If you are building a regular video, black or white is usually fine. If you are creating a graphic overlay or a logo animation that will be placed on top of another video in a different editor, you should set the background to transparent. This exports as a PNG sequence with an alpha channel, meaning wherever the background is, nothing will appear when layered over other content. Understanding this distinction prevents a lot of frustration when working on overlay projects.
Working With Layers: The Foundation of Every Edit
Every single element you add to your Alight Motion project becomes a layer. Layers are the building blocks of the entire editing system. Understanding how to add, manage, organize, and control layers is not optional knowledge. It is the core skill that everything else builds on. Once you genuinely understand how layers work, you will find that even complex-looking edits become logical and manageable.
Types of Layers You Can Add
Alight Motion supports several distinct layer types, each with its own set of editing controls:
| Layer Type | What It Holds | Key Editing Controls |
|---|---|---|
| Video | Recorded footage or imported video clips | Trim, speed, reverse, chroma key, color grade |
| Image | Photos, PNGs, static graphics | Scale, rotate, opacity, effects, masking |
| Shape | Vector rectangles, circles, polygons, custom paths | Fill, stroke, path animation, trim path |
| Text | Typed words and individual characters | Font, size, color, gradient, stroke, character animation |
| Audio | Music tracks, voice recordings, sound effects | Trim, volume, fade in/out, keyframed volume changes |
| Composition | A nested group of multiple layers treated as one | Transform and effects applied to all child layers simultaneously |
Layer Stacking Order and Visibility
The order in which layers appear in your timeline stack directly controls what the viewer sees in front of what. The layer at the very top of the stack appears in front of everything else in the preview window. The layer at the very bottom appears behind everything else. This concept is called the Z-order or stacking order, and it is fundamental to compositing. For example, if you want a text layer to appear over a video, the text layer must sit above the video layer in the timeline. If the text layer is below the video layer, the video completely covers the text and it becomes invisible.
Each layer has a visibility toggle, represented by an eye icon, which lets you temporarily hide a layer without deleting it. This is extremely useful when you are working on complex compositions and want to see how things look without a specific element. You can also lock layers to prevent accidental edits to elements you have already positioned correctly. These controls are small details but they become important habits when you are working with fifteen or twenty layers in a single project.
Duplicating, Grouping, and Naming Layers
Duplicating a layer creates an exact copy including all applied effects, keyframes, and property settings. This saves significant time when you need multiple elements with similar properties. Instead of building the same text animation from scratch three times, you build it once and duplicate it, then change only what needs to be different. Long-pressing a layer in the timeline reveals the duplicate option alongside other layer management options.
Grouping layers connects multiple individual layers into a single group that can be moved, scaled, and animated as one unit. This is useful for building composite elements like an animated lower-third that includes a background shape, a line separator, and two text layers. By grouping these four layers, you can position and animate the entire element together without having to manually synchronize four separate tracks. Groups appear as a single track in the timeline but can be expanded to show their individual contents.
Naming your layers is a professional habit that pays dividends on complex projects. Alight Motion automatically names new layers by their type, which means a project with ten text layers will show ten items all called Text Layer with numbers appended. Renaming each layer to something descriptive like Headline Text, Subtitle Fade, or Background Logo takes ten seconds per layer but saves minutes of confusion every time you need to find a specific element later.
Core Editing Tools: Trim, Split, Move, and Transform
These are the everyday tools you will reach for in every single project. They handle the fundamental work of arranging your media in time and positioning your elements in space. Learning them well means you spend less time on logistics and more time on creativity.
Trimming and Extending Clips
Trimming removes unwanted sections from the beginning or end of a layer. In the timeline, every layer has a left edge and a right edge. Dragging the left edge to the right shortens the start of the clip, removing the initial frames. Dragging the right edge to the left shortens the end of the clip. Dragging either edge outward extends the visible duration, though this only works up to the actual length of the source media. For images and shapes, extending works without restriction because they are not limited by a recorded duration.
Trimming is non-destructive in Alight Motion, which means the original media file is never modified. You are only adjusting which portion of the file the project displays. If you trim too much and realize later that you needed that footage, you can drag the edge back out to recover it. This is one of the most reassuring features of professional editing systems: the source material is always intact regardless of how aggressively you edit.
The Split Tool
Splitting divides one layer into two separate layers at the exact frame where the playhead is positioned. You position the playhead at the precise moment where you want the cut, select the layer you want to split, and tap the split button. The result is two independent layers: everything before the cut and everything after the cut. These two pieces can now be treated completely independently. You can delete one, add an effect to just the second half, insert a transition between them, or change the speed of only one portion.
Splitting is your primary tool for inserting transitions between clips, applying effects to specific sections of footage, or creating speed ramp effects where part of a clip plays at normal speed and another part plays in slow motion. It is a simple operation but it unlocks a tremendous amount of creative control when combined with the effect and animation tools.
The Move Tool and Transform Controls
The move tool is your primary tool for positioning elements within the frame. When it is active, you can tap any element visible in the preview window to select its layer, then drag it to reposition it. Beyond simple repositioning, the move tool activates transform handles: small dots and lines around the selected element that let you scale, rotate, and distort it directly. Dragging a corner handle scales the element proportionally. Rotating with two fingers changes its angle. These interactions feel intuitive once you have practiced them a few times.
The pivot point is a small crosshair or circle that marks the center of rotation and scaling for any element. By default it sits in the center of the element. Moving the pivot point off-center changes the behavior of rotation and scaling dramatically. An element with its pivot moved to one corner will spin around that corner rather than its center, creating orbital or pendulum motion effects. Understanding how to reposition the pivot point is one of those intermediate skills that immediately elevates the quality of your animations.
Numerical precision controls are available as an alternative to the touch-based transform interface. Tapping into the transform property panel gives you text fields where you can type exact values for position coordinates, scale percentages, and rotation degrees. This is invaluable when you need to align elements precisely or match the exact position or size of one layer to another. Creators building symmetrical designs or exact branded layouts use numerical inputs regularly.
Text Tools: From Simple Captions to Animated Typography
Text is one of the most used elements in mobile content creation and Alight Motion offers a genuinely powerful text system that goes far beyond what most mobile editors provide. Understanding the full capabilities of the text tools opens up kinetic typography, animated subtitles, branded title sequences, and decorative text effects that look professional and distinctive.
Adding and Editing Text
Tap the add layer button and select Text to create a new text layer. A text editing field appears where you type your content. Once you confirm the text, a text layer appears in the timeline and the text is visible in the preview window. To edit the text content after creation, simply double-tap the text in the preview window or tap the text edit option in the layer panel. The layer retains all applied formatting and effects when you edit the words inside it.
Font selection in Alight Motion includes a growing library of built-in fonts across categories including sans-serif, serif, display, handwriting, and monospace styles. Premium subscribers have access to more fonts, and the app regularly adds new options. You can adjust font size using a slider or numerical input, set line height and letter spacing for fine typographic control, align text to the left, center, or right, and toggle between regular, bold, and italic weights where the selected font supports them.
Text Color, Stroke, and Fill Options
Text in Alight Motion supports multiple fill types beyond a solid color. You can fill text with a solid color, a gradient fill that transitions between two or more colors, or even leave the text transparent and use only a stroke outline. The gradient fill is particularly useful for creating eye-catching title text that shifts between brand colors or uses trendy color combinations that match current design trends on social media.
The stroke option adds an outline around each letter. You can control the stroke color, the stroke width, and whether the stroke appears inside, outside, or centered on the letter edge. Adding a contrasting stroke behind bright text makes it readable over any background without adding a separate shadow. Shadow controls for text work similarly, letting you offset a duplicate of the text in any direction and distance with adjustable opacity and blur amount.
Animating Text with Keyframes and Per-Letter Animation
Text layers can be animated exactly like any other layer using keyframes. You can set position keyframes to make text slide in from off-screen, opacity keyframes to make it fade in and out, scale keyframes to make it grow from a small point, and rotation keyframes to add a spin or flip effect. Combining several of these animated properties together on the same text layer produces complex, polished animations that draw viewer attention effectively.
Alight Motion also offers character-level animation, which animates each letter or character of a text string individually rather than moving the entire block of text at once. This produces effects like letters appearing one at a time in sequence, letters bouncing independently, or words splitting apart as they exit the frame. Character animation is one of the features that sets Alight Motion apart from simpler mobile editors and produces the kind of text effects you typically associate with professional motion design software.
Shape Tools and Vector Graphics in Alight Motion
One of the most distinctive capabilities of Alight Motion compared to other mobile video editors is its support for vector graphics. Vector shapes are mathematically defined, which means they remain perfectly sharp and crisp at any size or resolution. Whether your shape is two pixels wide or fills a 4K frame, the edges are always clean. This is fundamentally different from pixel-based images, which become blurry when scaled up beyond their native resolution.
Basic Shape Tools: Rectangle, Circle, and Polygon
Alight Motion includes a set of built-in shape tools for creating common geometric forms. The rectangle tool creates squares and rectangles with adjustable corner radius, letting you go from sharp-cornered boxes to fully rounded pill shapes by sliding one control. The circle tool creates perfect circles and ellipses. The polygon tool creates any regular polygon with a variable number of sides, which can produce triangles, pentagons, hexagons, stars, and other multi-sided shapes depending on how many points you set and how far the inner radius is pulled in.
Each shape supports fill color, gradient fill, and stroke controls identical to those available on text layers. You can also apply any visual effect from the effects library to shapes, which allows you to create glowing panels, blurred backgrounds, distorted frames, and animated geometric patterns that form the backbone of many popular Alight Motion edit styles.
The Pen Tool and Custom Path Drawing
The pen tool lets you draw completely custom vector shapes by placing anchor points one at a time. Each anchor point can be a sharp corner or a smooth curve point, and you can adjust the curve handles on each point individually to shape the path exactly as you intend. This is the same tool philosophy used in Adobe Illustrator and Inkscape, and it gives you the ability to create any shape imaginable rather than being limited to preset geometric forms.
Custom paths created with the pen tool can be animated, which opens up the concept of path animation or stroke animation. You can animate the trim path property of a custom shape to make it appear to draw itself on screen in real time. This self-drawing line or shape effect is one of the signature looks of professional motion graphics and is achievable in Alight Motion without any plugins or additional software. It is a technique worth learning because it produces impressive results that are difficult to achieve in simpler applications.
Keyframe Animation: The Engine Behind Every Effect
Keyframes are the mechanism that makes animation possible in Alight Motion. Understanding keyframes is genuinely the most important technical concept in the entire application. Once you understand how they work, you stop seeing effects as mysterious and start seeing them as logical chains of property changes over time. Every smooth transition, every animated element, every effect that evolves as the video plays is built on keyframes.
What Keyframes Are and How They Work
A keyframe is a recorded state of a property at a specific point in time. When you set two keyframes for the same property at two different time positions with different values, Alight Motion automatically calculates all the intermediate values between those two points and applies them as the playhead moves through that range. This automatic calculation is called interpolation, and it is what creates smooth animation rather than a jarring instant change.
For example, if you set a layer’s opacity to zero at the zero-second mark and set its opacity to one hundred at the two-second mark, Alight Motion will animate the opacity smoothly from invisible to fully visible over those two seconds. The viewer sees a clean fade-in. The application did all the mathematical work between those two recorded states automatically. This is the core principle behind every animated property in the application.
Properties that can be keyframed in Alight Motion include position on the X and Y axes, scale on both axes independently or linked proportionally, rotation angle, opacity, anchor point position, individual color values, blur amount, shadow distance and opacity, stroke width, and many effect-specific parameters. Essentially, almost any number you can adjust on any layer can be keyframed and animated over time.
Setting Keyframes: Step-by-Step Process
Here is the exact process for adding keyframes to animate any property:
- Select the layer you want to animate by tapping it in the timeline.
- Move the playhead to the time position where you want the animation to start.
- Enable the keyframe recording for the property you want to animate by tapping the diamond icon or the clock icon next to that property.
- Set the starting value for the property at this position.
- Move the playhead to the time position where you want the animation to end.
- Set the ending value for the same property at this new position.
- Alight Motion automatically creates a keyframe at each position and animates the transition between them.
- Play the timeline to preview the animation and adjust keyframe positions or values as needed.
Easing and Interpolation Curves
By default, keyframe interpolation in Alight Motion is linear, meaning the property changes at a constant rate between two keyframes. While this produces smooth transitions, linear animations often feel mechanical and artificial to the eye. In real life, objects accelerate as they start moving and decelerate as they stop. This acceleration and deceleration pattern is what makes motion feel natural and organic.
Alight Motion provides easing options that modify the interpolation curve between keyframes. Ease In makes the animation start slowly and accelerate toward the ending keyframe. Ease Out makes it start fast and decelerate toward the end. Ease In and Out does both, starting and ending slowly with speed in the middle. These three basic easing types account for the vast majority of natural-feeling motion. Beyond these presets, a custom curve editor lets you draw the exact acceleration profile you want for full control over motion timing.
Learning to recognize and apply appropriate easing is one of the clearest markers of an experienced animator. Animations without easing look like computer-generated placeholders. Animations with thoughtful easing feel intentional, polished, and professional. This single concept, more than any visual effect or color grade, is what makes the difference between content that looks amateur and content that looks like it was made by a skilled editor.
Easing Types at a Glance
| Easing Type | Motion Behavior | Best Used For |
|---|---|---|
| Linear | Constant speed from start to finish | Mechanical motion, scrolling tickers, conveyor belt effects |
| Ease In | Starts slow, accelerates toward the end keyframe | Elements leaving the frame, exit animations |
| Ease Out | Starts fast, decelerates to a stop at end | Elements entering the frame, landing animations |
| Ease In and Out | Slow start, fast middle, slow end | General natural motion, element repositioning |
| Custom Curve | Fully user-defined acceleration profile | Bouncing, elastic, spring, and complex timing effects |
Visual Effects and the Alight Motion Effects Library
The effects library is where Alight Motion truly shows its range. With hundreds of individual effects organized into categories, the library can feel overwhelming at first. The best approach is to understand the major categories, learn what each category of effects is designed to accomplish, and then explore individual effects within the categories that are relevant to your work. Knowing the territory before exploring it makes the exploration much more productive.
Alight Motion Effects Library: Category Overview
| Category | Key Effects | Common Use Cases |
|---|---|---|
| Blur | Gaussian, Motion, Radial, Linear, Zoom | Depth of field, speed blur, focus transitions, frosted backgrounds |
| Color | Brightness, Contrast, Saturation, Hue, Color Tune, Vignette | Cinematic grading, mood setting, brand color matching, exposure correction |
| Glow and Light | Glow, Inner Glow, Stroke Glow, Lens Flare | Neon text, energy overlays, dramatic transitions, light accents |
| Distortion | Ripple, Wave, Displacement Map, Perspective | Creative warp effects, liquid transitions, 3D surface simulation |
| Stylistic | Pixelate, Halftone, RGB Split, Noise and Grain | Glitch aesthetics, retro looks, VHS tape simulation, film texture |
| Shadow and Stroke | Drop Shadow, Inner Shadow, Stroke Outline | Text readability, depth illusion, outlined graphics |
| Particles | Sparks, Fire, Snow, Confetti, Smoke, Bubbles | Ambient atmosphere, celebration effects, elemental overlays |
Blur Effects
Blur effects soften or obscure visual information in controlled ways. Gaussian blur creates a uniform softening in all directions and is the standard blur used for creating depth of field simulations, frosted glass backgrounds, and focus transitions. Motion blur adds a directional smear in the direction of an object’s motion, which makes fast-moving elements look more realistic. Linear blur creates a blur along a single axis, which can simulate a camera tilt or emphasize horizontal speed. Radial blur creates a circular smearing effect from a center point. Zoom blur creates an expanding or contracting blur from a focal point.
Color Effects and Grading Tools
Color correction and grading tools in Alight Motion give you precise control over how your footage or graphics look visually. Brightness adjusts the overall lightness of the layer. Contrast increases or decreases the difference between the lightest and darkest parts of the image. Saturation controls the intensity of colors, from completely desaturated grayscale to vivid oversaturated color. Hue rotation shifts all colors around the color wheel simultaneously. Exposure simulates camera exposure adjustment and affects both brightness and color balance together.
Beyond individual adjustments, the Color Tune effect provides a comprehensive color grading interface with curves for controlling brightness and color balance on a tonal range basis. The curves tool lets you brighten shadows while darkening highlights simultaneously, add warmth to the midtones while cooling the shadows, or push the image toward any color aesthetic you intend. Learning the curves tool unlocks genuine cinematic color grading that matches the kind of work done in professional desktop color software.
The vignette effect darkens or brightens the edges of the frame to draw the viewer’s eye toward the center. It is a classic filmmaking technique that adds a subtle premium feel to footage. The chromatic aberration effect splits color channels slightly to simulate lens distortion artifacts, adding a grungy or lo-fi aesthetic. Noise and grain effects add film grain texture to smooth digital footage. These stylistic tools are popular for specific aesthetic trends in social media video content.
Glow and Light Effects
Glow creates a soft luminous halo around bright areas of a layer, adding a dreamy or energetic quality depending on the settings. The glow effect is particularly effective on text, geometric shapes, and neon-style designs. You can control the glow radius, intensity, and color to dial in the exact look you want. The stroke glow applies glow specifically to the outline of a layer rather than its interior, which works well for creating neon-lit text effects.
Inner glow places the luminous effect inside the layer boundary rather than around the outside, creating a backlit or illuminated appearance. Flare effects simulate the light flares that occur when a camera lens catches a bright light source directly. Used tastefully, lens flares add a cinematic energy to transitions and high-intensity moments. Used excessively, they can overpower the content and distract from the message, so restraint is always the professional approach.
Distortion and Stylistic Effects
Distortion effects bend, warp, and stretch layer content in controlled ways. The ripple effect simulates the appearance of content being viewed through disturbed water. The wave distortion adds a sinusoidal warping pattern. Displacement maps use the brightness information of one layer to distort the appearance of another, which is a technique used in advanced visual effects compositing. Perspective distortion tilts and angles a flat layer to simulate a three-dimensional surface.
Stylistic effects like the pixelate filter break the image into visible square pixels for a retro digital aesthetic. The halftone effect converts the image into a pattern of dots that replicates the look of printed media. RGB split separates the red, green, and blue color channels of the layer and offsets them slightly from each other, creating a glitch or VHS tape distortion effect that has been consistently popular in music video edits and action content for several years.
Particle Effects and Advanced Visual Elements
Particle effects generate numerous small individual elements that move, scatter, and behave according to physical simulation rules. Sparks, fire, smoke, snow, confetti, bubbles, and similar effects are all built on particle systems. In Alight Motion, particle effects can be applied to layers and customized with controls for emission rate, particle size, speed, direction, lifetime, and color range. Animating these parameters with keyframes produces particles that evolve dynamically throughout your video rather than looping in a repetitive pattern.
Blending Modes: How Layers Interact With Each Other
Blending modes control how a layer interacts visually with the layers beneath it in the stack. By default, every layer is set to Normal blending, which means it simply covers whatever is below it according to its opacity and transparency. Changing the blending mode triggers a mathematical calculation between the color values of the current layer and the layers beneath, producing results that can look like light mixing, shadow casting, color tinting, and many other composite effects.
The most commonly used blending modes in content creation are Screen, which brightens the layer beneath and is ideal for overlaying light textures and smoke elements, Multiply, which darkens and is perfect for adding shadow overlays and paper textures to footage, Overlay, which increases contrast and color saturation and is frequently used for adding color grading looks, Add, which maximizes brightness and produces an intense glow effect when used with bright elements, and Soft Light, which gently brightens and saturates without the harshness of Overlay.
Understanding blending modes expands what you can do with stock footage elements enormously. A texture clip in Screen mode placed over your main footage adds ambient texture without the hard edge of an opacity layer. A color gradient in Multiply mode adds a tinted shadow effect. A light leak clip in Add mode burns bright light streaks into your footage. These combinations produce cinematic results and require no masking, no rotoscoping, and no complex layering setup. The blending mode does all the work.
Masking: Revealing and Hiding Parts of Any Layer
Masking is the technique of hiding parts of a layer using a defined shape or boundary. Whatever area the mask covers reveals the layer in that area, and wherever the mask does not cover, the layer is invisible. You can invert this behavior so the masked area is hidden and the unmasked area shows. Masking is how professional editors create split-screen effects, reveal animations where text or graphics appear to emerge from behind a surface, and selective focus effects where only part of an image is clearly visible.
Shape Masks vs. Track Mattes
Shape masks are simple and direct. You draw a rectangle, circle, or custom path on the layer, and that shape defines the visible boundary. Anything inside the shape is visible, anything outside is invisible. You can feather the edge of a shape mask to create a soft gradual transition rather than a hard cut, which is useful for vignette-style framing and subtle reveals. Multiple shape masks can be applied to a single layer, and they can be combined with additive or subtractive logic.
Track matte masking uses the luminance or alpha information of one layer to define the visibility of another layer. This is a more advanced technique that enables complex organic mask shapes. For example, placing a video of flowing smoke above your main footage and setting the main footage to use the smoke layer as an alpha track matte causes the main footage to only show through the smoke areas of that overlay. As the smoke moves, the visible area of the main footage shifts organically, creating a dramatic and intricate effect that would be impossible to draw as a simple shape mask.
Animated Masks and Reveal Effects
Masks can be animated using keyframes exactly like any other property. Animating the scale or position of a mask creates a reveal or wipe transition effect. Animating a mask along a path draws the revealed area progressively across the frame in a controlled direction. These animated mask reveals are fundamental techniques for intro animations where text appears to be uncovered by a moving shape, for score reveals where numbers count up and appear to emerge from below a line, and for transition wipes between different sections of a video.
Audio Editing and Music Synchronization
Good audio work elevates even the most visually stunning edit, and Alight Motion includes a capable set of audio tools that handle the essential requirements of mobile content creation. While it is not a dedicated audio production platform, its audio capabilities cover everything most video editors need for music-driven content, voiceover integration, and sound design layering.
Importing and Managing Audio Tracks
Adding audio to your project works the same way as adding any other layer. Tap the add layer button and select Audio, then navigate your device’s storage to the audio file you want to import. Alight Motion supports common audio formats including MP3, AAC, WAV, and M4A. The audio appears in the timeline as a waveform track, where the visual pattern of peaks and valleys represents the amplitude of the sound over time. This waveform visualization is extremely useful for identifying beats, drops, and transitions in music tracks.
Audio layers can be trimmed, moved, and positioned in the timeline exactly like video layers. Trimming an audio layer shortens the portion of the track that plays. Sliding the audio layer forward moves it later in the video timeline. You can stack multiple audio layers to layer music with voiceover or combine a music track with specific sound effects placed at precise moments. Each audio layer has its own volume control, which lets you balance the levels between multiple tracks without affecting the source files.
Volume, Fade In, and Fade Out Controls
Volume control for each audio layer is available in the layer properties panel. Setting volume to fifty percent halves the perceived loudness without changing the audio content. Setting it above one hundred percent can amplify quiet recordings, though this should be done carefully as over-amplification introduces distortion artifacts. Keyframing volume allows you to create dynamic volume changes over time, which is useful for ducking music volume during voiceover sections and then bringing it back up when the speech ends.
Fade in and fade out are the most essential audio editing techniques for any creator. A fade in gradually increases the volume from silence to full level at the beginning of an audio section, preventing the jarring effect of a track starting at full volume instantly. A fade out does the opposite at the end. In Alight Motion, fades can be applied by keyframing the volume property or by using the dedicated fade handles that appear on audio tracks in the timeline as small triangles that you drag to set the fade duration. Clean fades between audio sections are one of the clearest marks of a well-produced edit.
Presets, XML Files, and the Alight Motion Community
The preset and XML sharing ecosystem around Alight Motion is one of the most active and creative communities in mobile content creation. Understanding how to use presets and how to import XML files gives you access to thousands of ready-made animation styles, transition packs, and effect combinations created by other editors and shared freely across social platforms including YouTube, Instagram, and TikTok.
What Presets Are and How to Import Them
A preset in Alight Motion is a saved configuration of effects, animations, and property settings that can be applied to any layer instantly. Instead of recreating a complex glowing text animation from scratch each time you need it, you save it as a preset once and apply it with a single tap in any future project. The Alight Motion interface has a Presets tab in the effects panel where your saved presets appear and where imported presets can be added.
Importing presets shared by other creators typically happens through QR codes. The creator who made the preset exports it as a QR code image. You save that QR code to your device, then open Alight Motion, navigate to the Presets section, and select the Import option. Pointing the camera at the QR code or selecting the saved image loads the preset data into your application. Many creators share entire preset packs containing dozens of effects, transitions, and animations this way, and finding these packs on YouTube or Instagram is straightforward since the community is generous about sharing.
XML Files and Project Templates
Alight Motion projects can be exported and imported as XML files, which are text-based files that describe the entire structure of a project including all layers, effects, keyframes, and timing. Sharing an XML file essentially shares the entire project template. When another creator imports your XML, they receive the complete edit structure and can customize the text, colors, media, and timing to make it their own while keeping the core animation framework intact.
XML template packs are extremely popular for intro animations, transition sequences, and lower-third designs. Many creators build their entire brand identity around a collection of XML templates that they apply consistently across all their content, ensuring a coherent visual style video after video without having to rebuild everything from scratch each time. Learning to read and modify XML files is an advanced skill that gives you the ability to customize templates at a deeper level than the app interface allows.
Chroma Key and Green Screen Compositing
Chroma key, commonly called green screen or color keying, is the technique of removing a solid color background from video footage and replacing it with different content. Alight Motion includes a chroma key tool that makes this compositing technique accessible on a mobile device. While professional chroma key work requires careful lighting and high-quality footage, the tool in Alight Motion handles typical green screen footage effectively and produces clean results with proper setup.
To use chroma key, select the video layer you want to key, navigate to the effects panel, and add the Chroma Key effect. A color picker appears where you tap the green color in your footage to tell the application which color to remove. Additional controls let you adjust the threshold, which determines how close a color needs to be to the selected color before it is removed, and the edge softness, which feathers the boundary between the keyed area and the retained subject. Getting these two controls right is the key to clean compositing results.
Once the green screen is removed, the subject from your footage appears against whatever is on the layers below it in the timeline. Place a background image, a video clip, or a custom graphic below the keyed layer, and the subject appears to exist within that environment. This technique is used extensively for educational content, product demonstrations, virtual backgrounds, and creative visual storytelling where placing a subject in an otherwise impossible environment adds narrative impact.
Speed Control: Slow Motion, Fast Forward, and Speed Ramps
Speed control is a simple concept with a powerful impact on the rhythm and feel of video content. Alight Motion provides straightforward speed controls that let you slow down or speed up any video layer independently of the rest of the project timeline. Accessing speed controls requires selecting a video layer and opening the layer properties, where a speed slider or percentage input lets you set the playback speed from a fraction of normal speed up to several times normal speed.
Slow motion at fifty percent speed doubles the duration of a clip while halving its perceived pace. This is commonly used for impact moments, emotional highlights, and action sequences where the viewer’s attention should linger. Running a clip at twenty-five percent of normal speed creates dramatic slow motion that emphasizes every detail of the movement. Fast forward at two hundred percent speed compresses time for transitions between scenes, time-lapse style sequences, and comic effect.
Speed ramping, the technique of gradually transitioning between different speeds within the same clip, is achievable in Alight Motion by splitting a clip at the transition points and setting different speeds on each segment. While this is a more manual approach than the dedicated speed graph tools found in desktop editors, it produces the same essential effect. Many of the most visually impressive action edits on social media use this technique, accelerating through a movement, snapping to slow motion at the peak, and then accelerating out again to create a visual punctuation that guides the viewer’s attention.
Exporting Your Project: Settings for Every Platform
The export stage is where your work becomes a shareable file, and choosing the right export settings for your intended platform is essential for ensuring your video looks as good when published as it does in the editor. Poor export settings are one of the most common reasons videos look softer, noisier, or lower quality on social media than they appeared during editing, and it is an entirely avoidable problem with a clear understanding of what each setting controls.
Video Export Settings in Detail
Tapping the export button opens the export configuration panel. Resolution should match your project settings, so a 1080p project exports at 1080p. Frame rate should also match your project frame rate. The format for almost all social media platforms is MP4 with H.264 encoding, which produces small file sizes at good quality. If you need maximum quality for editing in another application, MP4 with H.265 encoding offers better quality at similar file sizes but requires more processing power to encode.
Bitrate is the most important quality control in the export settings. Measured in megabits per second, bitrate determines how much data is used to store each second of video. Higher bitrate means more data, better quality, and larger file size. For 1080p social media uploads, a bitrate between 8 and 16 megabits per second is the standard working range. At the lower end, you get smaller files that upload faster. At the higher end, you get noticeably sharper detail and better color accuracy, especially in areas with complex gradients or fast motion.
For GIF exports, the settings work differently because GIF is a significantly older format with a maximum of 256 colors and no audio support. GIF resolution and frame rate should be reduced from your project settings to keep file sizes manageable since GIFs have no compression efficiency compared to modern video codecs. A typical social media GIF works well at around 480 pixels wide and 15 frames per second. PNG sequence export renders each frame as a separate high-quality still image with full transparency support, which is used for feeding frames into another compositing application.
Platform-Specific Export Recommendations
Each major platform has specific technical preferences for uploaded video. The table below gives you the recommended settings at a glance:
| Platform | Resolution | FPS | Bitrate (Mbps) | Format / Codec |
|---|---|---|---|---|
| TikTok | 1080×1920 | 30 or 60 | 8 to 12 | MP4 / H.264 |
| Instagram Reels | 1080×1920 | 30 | 12 to 16 | MP4 / H.264 |
| YouTube Shorts | 1080×1920 | 60 | 8 to 12 | MP4 / H.264 |
| YouTube Standard | 1920×1080 | 24 or 30 | 12 to 25 | MP4 / H.264 or H.265 |
| YouTube Gaming/Action | 1920×1080 | 60 | 16 to 25 | MP4 / H.264 or H.265 |
| 4K Professional | 3840×2160 | 24 or 30 | 40+ | MP4 / H.265 |
| GIF (Social Share) | 480px wide | 15 | N/A | GIF (256 colors, no audio) |
Advanced Techniques for Expert-Level Results
Once you have a solid foundation in the core tools and functions covered in the previous sections, you are ready to move into the techniques that separate competent editors from genuinely skilled ones. These advanced concepts require more practice and experimentation than the basics, but they produce results that are noticeably more professional and difficult to achieve with simpler approaches.
Nested Compositions for Complex Projects
Nested compositions, also called pre-compositions or composition layers, allow you to group a complete sub-project into a single layer that can be used inside another project. This is an organizing technique that becomes essential when working on complex productions with many elements. Instead of managing a timeline with fifty individual layers, you create five composition layers each containing ten related layers, giving you a clean top-level view while keeping each sub-section fully editable by diving into the composition.
Nested compositions also allow you to apply effects and transformations to an entire group of elements at once. If you want to apply a color grade to a group of layers together rather than individually, you nest them all into a composition and apply the color effect to the composition layer. Every element inside inherits the effect. This technique is used extensively in professional motion design and is directly applicable to the kind of branded content and template-based work that dominates social media production.
Expression-Like Property Linking and Synchronization
While Alight Motion does not support JavaScript-based expressions in the way Adobe After Effects does, experienced users develop workflows that create synchronized behaviors between layers through careful keyframe timing, duplicated animation paths, and the strategic use of grouped and nested layers. Understanding how to achieve synchronized multi-element animations without expression support is a valuable skill that requires both patience and creative problem-solving.
Color Grading Workflow for Cinematic Results
Professional color grading in Alight Motion follows a two-stage process that mirrors the workflow used in dedicated color software. The first stage is color correction, where you neutralize any problems in the original footage by adjusting exposure for proper brightness, correcting white balance so neutral colors appear truly neutral, and balancing the levels so shadows have detail and highlights are not blown out. The goal of correction is not to make the footage look stylized but to make it look accurate and clean.
The second stage is creative color grading, where you intentionally shift the color to establish a mood or aesthetic. Warm grades push toward orange and yellow tones and feel energetic and inviting. Cool grades push toward teal and blue and feel calm, technical, or melancholic. The teal and orange look, which is one of the most popular film color grades of the past decade, pushes skin tones toward orange while shifting shadows and backgrounds toward teal. Creating this in Alight Motion using the curves and hue controls produces the cinematic signature that audiences associate with high-quality video production.
Motion Tracking Principles and Techniques
Motion tracking is the technique of attaching one element to the movement of another, so that an overlay follows the motion of a subject in video footage. While Alight Motion does not include automated motion tracking that analyzes footage and generates a track automatically, experienced users achieve similar results through manual keyframing. By carefully placing position keyframes frame by frame to match the movement of a subject, you can pin text, graphics, or effects to moving subjects in your footage.
For longer sequences or complex movements, manual tracking is time-consuming, but for short clips or slower movement, it produces clean results. The key to clean manual tracking is zooming in on the timeline to see individual frames, then setting keyframes with the playhead advanced one frame at a time and adjusting the overlay position to match the subject’s new position in each frame. With practice, the process becomes faster and the results look professional.
Building and Using Your Own Templates
Building your own template library is one of the highest-leverage investments you can make in your editing workflow. A template is a pre-built project containing the structural elements of a type of video you create frequently: an intro animation, a thumbnail text design, a lower-third layout, a transition sequence, or a full episode framework. By building and saving these templates, you convert hours of work per video into minutes of customization.
The process is straightforward: build the edit structure you want to reuse, export it as an XML file and save it to organized storage on your device, then import that XML at the start of each new project that uses that format. Replace placeholder text with new content, swap placeholder images with the new media, adjust colors if needed, and export the finished video. Creators who work with consistent content formats save an enormous amount of time this way and maintain a stronger visual brand consistency across their published work.
Performance Optimization for Complex Projects
Complex Alight Motion projects with many layers, multiple effects, and high-resolution media can slow down preview performance and make editing less responsive. Several strategies help maintain smooth performance without sacrificing quality in the final export. Reducing preview quality in the settings while working speeds up the real-time preview significantly and has no effect on the exported video quality. The lower preview quality only affects what you see while editing.
Keeping the number of active effects per layer as low as possible by combining multiple adjustments into fewer effects layers also helps performance. Hiding layers that you are not actively working on reduces the processing load during preview playback. Closing and reopening the application between heavy editing sessions frees up RAM that has accumulated temporary data. Working in sections and rendering those sections before adding more content is a professional strategy for managing very long or very complex projects on devices with limited processing power.
How Alight Motion Compares to Other Mobile Editors
Understanding where Alight Motion sits relative to its competition helps you make informed decisions about which tool to use for which type of project and helps you appreciate what makes the application genuinely distinctive rather than simply different.
CapCut is probably the most direct competitor in terms of user base size. CapCut excels at quick social media edits with its template library, auto-captions, and one-click effects that require minimal technical knowledge. However, CapCut’s animation system is much simpler than Alight Motion’s. It does not offer the same depth of keyframe control, the vector graphics tools, the custom path animation, or the blending mode system that Alight Motion provides. For creators who want speed and templates, CapCut is faster. For creators who want genuine creative control and animation quality, Alight Motion is superior.
KineMaster is a long-standing mobile editor that offers multi-track editing and a respectable effects library. It serves creators who primarily work with recorded footage and need good clip-level editing tools. However, KineMaster lacks the animation depth and vector graphics capabilities of Alight Motion. Its layer system is less flexible, and its keyframe controls, while present, are not as comprehensive as what Alight Motion offers.
Adobe Premiere Rush is Adobe’s mobile offering, and it carries the benefit of integration with the broader Adobe ecosystem. For creators already working in Premiere Pro on desktop and needing to do quick mobile edits that integrate with that workflow, Rush has a clear advantage. However, Rush is primarily a linear video editor without the animation engine that makes Alight Motion suitable for motion graphics work. It does not attempt to do what Alight Motion does.
The honest assessment is that Alight Motion occupies a specific niche that none of its primary mobile competitors adequately fills: professional-grade animation and motion graphics production on a mobile device. For pure video editing without animation, other apps may be simpler. For learning motion design principles and producing animated content on a phone, Alight Motion is the clear choice.
Side-by-Side Comparison: Alight Motion vs Top Competitors
| Feature | Alight Motion | CapCut | KineMaster | Premiere Rush |
|---|---|---|---|---|
| Keyframe animation depth | Advanced | Basic | Moderate | Basic |
| Vector graphics support | Yes | No | No | No |
| Multi-layer compositing | Full | Limited | Yes | Basic |
| Blending modes | Full suite | Limited | Yes | Limited |
| Chroma key / green screen | Yes | Yes | Yes | No |
| Beginner friendliness | Moderate | Very Easy | Moderate | Easy |
| Free plan available | Yes (watermark) | Yes | Yes (watermark) | Yes |
| Best suited for | Animation and motion graphics | Quick social media clips | Multi-track video editing | Adobe ecosystem users |
Practical Tips From Experienced Alight Motion Creators
Beyond the technical knowledge of how each tool works, there are practical habits and approaches that experienced creators develop over time that significantly improve both the quality of their work and the efficiency of their workflow. These tips come from the accumulated experience of working through real projects and encountering the kinds of challenges that do not appear in tutorials.
- Always start with project settings before adding any content. Changing resolution or aspect ratio after a project is built causes elements to shift, rescale, and require manual realignment. Set your resolution, frame rate, and background correctly at the very beginning and keep them consistent throughout.
- Save your project frequently during complex editing sessions. Alight Motion does save automatically, but developing the habit of manually saving after completing a significant section protects against data loss from crashes or interruptions.
- Learn the difference between applying an effect to a layer and applying it to a group or composition. Effects on individual layers affect only that layer. Effects on compositions affect every layer inside the composition. Knowing this distinction prevents unexpected results when adding effects to stacked elements.
- Study the work of editors whose output you admire and try to reverse-engineer how they achieved specific looks. This active analysis is one of the most effective ways to learn advanced techniques quickly because it forces you to think through the logic of how effects and animations are built.
- Use the undo function without hesitation. Alight Motion supports multiple levels of undo, so experimentation is always reversible. The willingness to try things, discover they are wrong, and undo quickly is one of the most important creative habits you can develop as an editor.
- Limit the number of effects you stack on a single layer, not just for performance reasons but for visual clarity. Every additional effect is another layer of complexity that the viewer’s eye has to process. Choosing three effects that work together purposefully almost always produces better results than ten effects layered without intent.
- Export a test render at lower quality before your final export to check for any issues including audio sync problems, unwanted flickering, or rendering artifacts that only become visible in the exported file rather than during preview playback.
Your Learning Path: From First Project to Expert Creator
Mastering Alight Motion is not a destination you arrive at suddenly. It is a gradual process of building competence in one area, then moving to the next, and returning to earlier areas with new understanding that makes them feel richer and more nuanced than they did the first time. Having a clear sense of the progression helps you direct your practice time effectively and measure your genuine growth.
Skill Progression Roadmap
| Stage | Timeframe | Skills to Focus On | Target Output |
|---|---|---|---|
| Beginner | Week 1 to 2 | Interface, adding layers, trim, split, move, export | A clean 3-layer edit exported successfully |
| Elementary | Week 3 to 4 | Keyframes, basic easing, text animation, shapes | An animated title card or simple logo reveal |
| Intermediate | Month 2 to 3 | Effects library, blending modes, masking, color grading, audio sync | A styled reel with graded color and smooth transitions |
| Advanced | Month 4 to 6 | Chroma key, nested compositions, custom easing, speed ramps, XML | Branded intro sequence and reusable template system |
| Expert | Month 6 onward | Complex compositing, particle systems, track matte masking, preset packs | Client-ready deliverables and shareable community presets |
In the first week of serious practice, focus entirely on the interface and the basic layer management tools. Create simple projects with two or three layers. Practice trimming, splitting, moving, and stacking. Export each project and evaluate the result honestly. The goal at this stage is comfort and familiarity, not impressive output.
In the following two to three weeks, focus on keyframes. Animate position, opacity, and scale. Apply easing to your animations and compare the difference. Build simple text animations and a basic logo reveal using shape layers and animated masks. These foundational animation skills are the ones you will use in every project going forward, and investing time in them at this stage compounds enormously over the following months.
Over the next month, explore the effects library systematically. Spend time in each major category, apply effects to test layers, observe what they do, and note the settings that produce results you find useful. Learn the blending modes by applying each one to a simple overlay and observing the result against different backgrounds. Start using the color grading tools on your footage systematically, working through the correction and grading workflow described earlier in this guide.
Beyond the first two months, growth comes primarily from project experience rather than tutorials. Taking on projects that push you slightly beyond your current ability, working through the challenges they present, and solving the creative problems they introduce builds skills that no tutorial can replicate. The most effective Alight Motion creators are not those who have watched the most tutorials but those who have spent the most time in the application building real projects for real purposes.
Conclusion: Alight Motion as a Creative Investment
Alight Motion is not the simplest mobile video editor available and it is not trying to be. It is a serious creative tool that respects the intelligence of its users and rewards the investment of learning time with capabilities that genuinely few other mobile applications can match. The learning curve is real, but it mirrors the learning curve of professional animation software, which means the skills you build in Alight Motion transfer to your understanding of After Effects, Motion, and other professional tools if you ever move to desktop-based production.
Every tool covered in this guide serves a specific purpose in the production workflow. The interface gives you spatial awareness of your workspace. Layers give you compositional control. The basic editing tools handle the mechanics of clip management. Keyframes power every animation you will ever create. Effects extend what is visually possible. Blending modes allow sophisticated compositing. Masks enable selective visibility and reveal techniques. Audio tools make the edit feel complete. Presets and XML sharing connect you to a global creative community.
The creators producing the most impressive mobile edits using Alight Motion are not necessarily those with the most natural talent. They are the ones who built a clear understanding of the tools, practiced consistently, and pushed their projects slightly beyond their current comfort level each time. That approach, combined with the knowledge laid out in this guide, gives you everything you need to go from a complete beginner to a genuinely skilled Alight Motion editor. All that remains is to open the application and start creating.
Frequently Asked Questions
Is Alight Motion completely free to use?
Alight Motion is free to download and use with a visible watermark on all exports. A subscription removes the watermark, unlocks the full effects library, provides access to all premium fonts, and enables higher-quality export options. The core animation engine, layer system, keyframe tools, and most fundamental editing functions are available without a subscription.
What devices work best for Alight Motion?
Any Android device running Android 5.0 or above and any iOS device running iOS 13.0 or above can run Alight Motion. For smooth editing on complex projects with many layers and effects, a device with 4GB or more RAM and a modern processor released in the past three years will provide a noticeably better experience than older or lower-end devices.
Can I use Alight Motion for professional client work?
Yes. Alight Motion is used by professional content creators, social media managers, and small creative agencies for client deliverables. The 4K export quality, professional animation tools, and clean visual output are fully suitable for professional work. The main limitation is project complexity: very long-form productions or extremely complex compositing work is more efficient on desktop software, but for social media content, branded short-form video, animated graphics, and promotional content, Alight Motion is a capable professional tool.
How is Alight Motion different from CapCut?
CapCut is primarily a video editing application optimized for speed, templates, and minimal technical knowledge. Alight Motion is primarily an animation and motion graphics application that also handles video editing. CapCut is faster to learn and produces good results with less effort for basic social media clips. Alight Motion requires more learning but provides significantly deeper control over animation, compositing, and visual effects, and produces output that looks more deliberately designed and less template-generated.
Where can I find Alight Motion presets and XML templates?
The most active communities for Alight Motion presets and XML templates are YouTube, where many creators build tutorial channels that include downloadable preset packs, Instagram, where preset QR codes are shared regularly in creator posts and stories, TikTok, where edit tutorials often include links to the presets used, and Pinterest, where curated collections of Alight Motion effects and resources are organized by style and effect type. Searching for Alight Motion preset or Alight Motion XML on any of these platforms returns extensive results.
How long does it take to become skilled in Alight Motion?
With consistent daily practice, most people can produce competent social media edits within two to four weeks of starting. Reaching an intermediate level where you are comfortably using keyframes, effects, and basic compositing typically takes one to three months. Reaching an advanced level where you are building complex animations, using masking and blending modes fluently, and creating your own template systems usually takes six months to a year of regular production work. These timelines accelerate significantly when you are creating real content for real publishing rather than just practicing on test projects.