How to Move, Group, and Manage Layers in Alight Motion – Complete Guide (2026)
If you want to transform your simple video clips into professional-grade animations and motion graphics, you need to master one fundamental concept: Layers. Layers are the absolute backbone of all advanced video editing. Understanding how to manage them is the key that unlocks Alight Motion true creative power.
If you are a beginner or a experienced person working for many years so you’re at the right place. This ultimate guide for 2026 will walk you through everything you need to know about moving, grouping, and managing layers like a pro.
What are Layers in Alight Motion?
Think of your video project as a transparent stack of papers. Each piece of paper is a layer, and on each layer, you can place a single element a video clip, a piece of text, a shape, an image, or an audio file. The layers are stacked on top of each other in the timeline. The layer at the very top of the list will appear in front of all the others in your final video. This system gives you complete control to edit each element independently without affecting the rest of your project.

Why is Layer Management Crucial in Alight Motion?
Managing your layers in Alight Motion is not only to keep it neat, you need to work fast, more attractive and it has to be the creative content among all of your competitors. Do you know when you will become master at this you will get:
Speed Up Your Workflow: Grouping related layers allows you to apply effects and animations to multiple elements at once, saving you an incredible amount of time.
Create Complex Animations: If you need to make the Professional motion graphics you can make it with many layers. When you will organize them effectively, you can create intricate scenes that would be impossible to manage otherwise.
Stay Organized and Stress-Free: A well-organized project with named and color coded layers is a joy to work on. You’ll never waste time searching for a specific element again.
Mastering Layer Movement in Alight Motion
Moving a layer can mean three different things. Here’s how to master each one.
Method 1:
Reordering Layers in the Timeline (Moving Up and Down)
This controls the stacking order (what’s in front and what’s behind).
- On the timeline, find the layer you want to move.
- Tap and hold the three-line icon on the far right side of the layer.
- After a moment, the layer will highlight, and you can now drag it up or down in the list.
- Now you have to release it into new position. Listen! When you will try to move a layer of your content on the top of the list, you will see that it will appear in front of all other visual elements.
Method 2:
Adjusting Layer Position on the Canvas
This controls where the element appears on the screen itself.
- Simply tap the layer on your timeline to select it.
- In the main preview window, you can now use your finger to drag the element (the text, image, or shape) to any position on the screen.
- Use two fingers to pinch to zoom to make the element larger or smaller.
Method 3:
Precise Positioning with the “Move & Transform” Tool
For perfect accuracy, this is the tool you need.
- Select the layer you want to adjust.
- Tap the “Move & Transform” button in the bottom menu.
- You will now see several options:
- Move: Use the on-screen joystick or enter exact X/Y coordinates to position your layer perfectly.
- Scale: Change the size of the layer.
- Rotate: You can now rotate content layer to the angle you want.
- Skew: Distort the layer for creative effects.
How to Adjust Layer Duration
Need an element to stay on Full screen ratio for a longer or shorter time? Trimming, Extending, and Shortening It’s simple.
- You need to just select the layer in timeline by tapping on it.
- You will see white arrow handles at the beginning and end of the layer bar.
- Tap and drag these handles to the left or right to trim (shorten) or extend (lengthen) the duration of the layer.
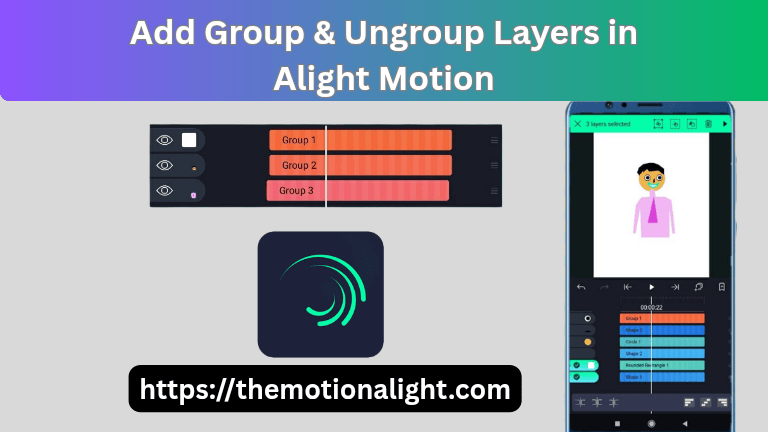
How to Group and Ungroup Layers in Alight Motion
Do you know? What is the secret weapon for managing or controlling difficult project?. The Secret is to Group and Ungroup the layers for neatness in work.
How to Group Layers in Alight Motion
On the timeline, tap and hold the name of any layer you want to include in the group until it is selected.
- Without letting go, you can tap on other layers to add them to your selection.
- Once all desired layers are selected, look at the top-right corner of the screen.
- Now click on the icon of grouping (you will see it like a box with a plus sign).
- Your selected layers will now be combined into a single “Group” layer on your timeline!
How to Ungroup Layers in Alight Motion
If you need to edit or change the a single layer again.
- Select the “Group” layer on your timeline.
- Tap the “Edit Group” button in the bottom menu.
- You will now see the individual layers inside the group. To permanently separate them, tap the three dots (…) in the top-right corner and select “Ungroup.”
Hide and Unhide Layers in Alight Motion
Sometimes you just need to get a layer out of the way to see what’s behind it.
How to Hide a Layer (Temporarily Disable Visibility)
On the left side of each layer in the timeline, you will see an “eye” icon. Simply tap the eye icon to hide that layer from the main preview. The layer is still there, just invisible.
How to Unhide a Layer (Make it Visible Again)
It’s very easy for making it layer visible again, man you just need tap the eye icon one more time.
Advanced Layer Organization Techniques
Ready to organize your projects like a true professional?
Using Color Labels to Categorize Your Layers
For projects with dozens of layers, color-coding is a lifesaver.
- Select a layer on the timeline.
- Tap the “Color” option in the bottom menu.
- Assign a specific color to that layer.
- You can use one color for all your text layers, another for your video clips, and another for your audio. This makes your timeline instantly readable.
How to Use Opacity and Blend Modes for better Effects
Click for selecting layer which you want to change the opacity and blending by clicking the “Blending & Opacity” button. Here you can:
Adjust Opacity: Lower the opacity to make a layer partially transparent.
Change Blending Modes: Experiment with modes like “Screen,” “Multiply,” and “Overlay” to change how your layer interacts with the layers beneath it, creating professional visual effects.
Pro Tips and Tricks for Smooth Layer Management
Tip 1: Always try to add a name to layers! If you try to add a new element, tap on its name at the top of the screen and give it a descriptive name (e.g., “Main Title Text,” “Background Music”). This practice will help you to stay organized and clean.
Tip 2: Use the duplicate layer function to save time. Click to select any layer, you’ll find a “Duplicate Layer” icon at the bottom menu. Whenever you need another copy of the same element or have already applied complex effects that you want to reuse.
Tip 3: Understand layer effects and animations. Remember that effects and keyframe animations are applied to individual layers. Grouping layers is secret and powerful weapon before applying a master effect can create powerful and attractive animation.
Layers Mistakes to avoid in Alight Motion
Problem: Having Too Many Disorganized Layers
Yes! you can say it is very easy to end up with dozens of layers named “Shape 1,” “Text 5,” etc. It is like a nightmare for finding and editing the specific element.
Solution: Regular Grouping and Naming Conventions
You need make it habit of adding the name of every layer as soon as possible. As you finish a section of your animation, group the relevant layers together and name the group (e.g., “Intro Sequence”). A clean project is a fast project.
Conclusion:
A beginner first and important step for becoming pro need to full control on the layer system in Alight Motion. Basically you can say it is the foundation among all of complex animations and stunning visual effects are built. By learning how to effectively move, adjust, group, and organize your layers, you unlock a faster, more efficient, and infinitely more creative workflow.
We encourage you to open a project right now and practice these techniques. By being the master in layer management will help you to pay off in high amount and professionalism of your future video projects.


